
How to Pack Dishes and Glassware So Nothing Breaks
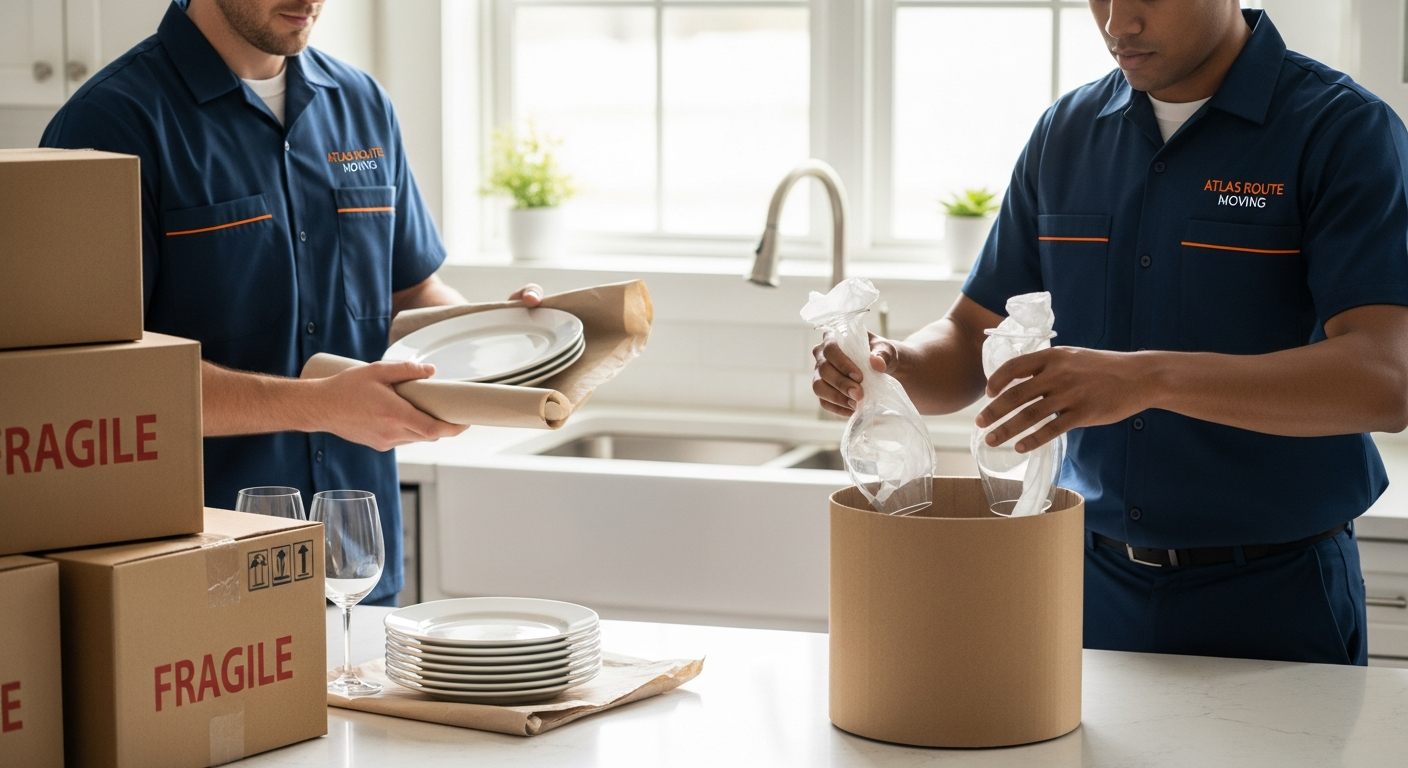
Packing your kitchen is usually the most stressful part of any move. Plates, bowls, wine glasses, coffee mugs, and serving dishes are not only fragile, they are often sentimental or expensive to replace. A rushed or careless job can turn into a box of broken glass and chipped plates on moving day.
Learning how to pack dishes and glassware properly makes a major difference. When you use the right materials, pack plates vertically, and cushion every layer, your boxes are far more likely to arrive in one piece, even on a long-distance move.
This guide walks you step by step through how to pack dishes for moving like a professional: what supplies to buy, how to wrap each type of item, when to use a dish barrel, how to protect fragile items with cushioning, and how to label and load your boxes so they travel safely in the truck.
We will also show you where full or partial packing services from Atlas Route Moving can take the pressure off if you are short on time, supplies, or patience for endless dish wrapping.
Key takeaways
- Use small or medium boxes or dish barrels for plates and glasses, never oversized boxes that become too heavy or allow items to shift.
- Always pack plates for moving vertically on edge with padding between each piece and cushioning at the bottom, sides, and top of the box.
- Wrap each glass and mug individually, filling the interior with paper before wrapping the outside to protect fragile items from internal and external pressure.
- Create a tight, cushioned fit so nothing rattles when you gently shake the box; if you hear movement, add more padding.
- Label boxes clearly with FRAGILE and THIS SIDE UP, and keep them stacked on top in the truck or moving container.
- Start packing rarely used dishes 1–2 weeks before moving day and keep a small “everyday essentials” set out until the last 1–2 days.
- Consider professional packing services if you have a large kitchen, limited time, or especially valuable dishware or glassware collections.
Why proper dish packing matters
Dishes and glassware are some of the most commonly damaged items in a move. They are heavy yet fragile, and kitchen boxes are often stacked under heavier items or shifted during loading. Proper technique reduces stress points and keeps impact forces from traveling directly to your plates and glasses.
When you understand how to pack dishes correctly, you:
- Reduce the risk of chips, cracks, and shattered glass.
- Save money by avoiding replacement costs.
- Save time during unpacking because items are grouped and labeled clearly.
- Make it easier and safer for movers to handle and stack your boxes.
For long-distance or interstate moves, your shipment may be handled multiple times. Small bumps add up. That is why professional movers follow strict methods for packing plates and how to wrap glasses for moving. This guide translates those techniques into steps you can do yourself at home.
Why dish shape and weight matter
Dinner plates, salad plates, bowls, mugs, wine glasses, and serving platters all have different shapes and weak spots. Wide flat plates can snap if pressure hits the center. Thin-stemmed glasses can crack with side pressure. Heavy stoneware adds weight that can crush lighter items beneath it.
Because of this, you will pack:
- Plates and flat items vertically on their edge.
- Glasses and mugs standing upright, fully wrapped.
- Heavier items at the bottom of a box or dish barrel, lighter ones at the top.
Supplies you need to pack dishes and glassware
The right materials make it much easier to protect fragile items and move quickly. Before you start, gather everything and set up a dedicated packing space, such as a cleared dining table or kitchen island.
Essential packing materials
- Small and medium moving boxes (1.5–3.0 cubic feet)
- Dish barrels or dish-pack boxes for extra protection
- Quality packing paper (newsprint, white packing paper)
- Bubble cushioning or foam sheets for delicate items
- Packing tape and a tape dispenser
- Permanent markers for labeling
- Optional cell dividers for glasses and stemware
- Towels or soft linens to fill gaps and add cushioning
Approximate supply planning
How much material you need depends on the size of your kitchen and how many breakables you own. The table below gives a rough idea for typical households.
| Kitchen size | Suggested dish boxes | Packing paper sheets |
|---|---|---|
| Studio / 1-bedroom | 3–5 small boxes or 2 dish barrels | 150–250 sheets |
| 2–3 bedroom home | 6–9 small/medium boxes or 4 dish barrels | 300–500 sheets |
| 4+ bedroom home or large kitchen | 10–14 boxes, mix of dish barrels and smalls | 600–900+ sheets |
If you are not sure, it is better to buy a little extra paper and boxes than to run out mid-pack. You can always use leftover paper for pantry items or other fragile belongings.
Set up a safe packing station
- Clear a table and cover it with a blanket or towel to add padding.
- Stack boxes nearby but keep plenty of room to move.
- Create a pile of packing paper and pre-torn strips of tape within reach.
- Keep a trash bag for scraps and broken-down packaging.
If you work with Atlas Route Moving for packing, our crew brings professional-grade boxes, dish barrels, wrapping paper, tape, and labeling tools, so you do not have to shop for supplies yourself.
Understanding dish barrels and when to use them
A dish barrel (also called a dish pack) is a specially designed, double-walled moving box built to protect fragile kitchen items. The cardboard is thicker than standard boxes, and the shape is tall and narrow, perfect for stacked plates and upright glasses.
When a dish barrel is a smart choice
- You are moving long-distance or interstate.
- You have a significant collection of dishes and glassware.
- You own high-value or sentimental pieces such as china, crystal, or heirloom serving dishes.
- You want extra protection beyond standard small boxes.
Dish barrel vs standard box comparison
| Box type | Best for | Pros / cons |
|---|---|---|
| Dish barrel (dish pack) | Plates, bowls, glasses, fragile serving pieces | Extra-strong walls, better protection, higher cost and slightly heavier when full |
| Small moving box (1.5 cu ft) | Everyday dishes, mugs, small bowls | Easy to carry, widely available, less protective than dish barrel |
| Medium moving box (3.0 cu ft) | Lightweight plastic items, pantry food, pots with lids removed | More space for bulky items, not ideal for heavy stacks of dishes or glassware |
You can still protect fragile items in regular small boxes with enough cushioning, but for the most important or heavy breakables, we recommend using at least a few dish barrels.
Step-by-step: packing plates vertically
If you only change one thing about how you pack dishes, let it be this: do not stack plates flat in a box. Professional movers always load plates on their edges because they withstand pressure and minor impacts much better this way.
Preparing the box
- Assemble the box with at least two layers of packing tape across the bottom, plus one strip along the seam.
- Place a thick layer of crumpled paper (3–4 inches) on the bottom to absorb shock.
- If using a dish barrel, follow any printed instructions for reinforcing the bottom.
Wrapping plates individually
- Lay a sheet of packing paper on your padded table.
- Place one plate in the center.
- Fold one corner of the paper over the plate, then the opposite corner, then the remaining two corners so the plate is fully covered.
- For very fragile or valuable plates, add a second sheet and repeat.
You can stack 2–3 plates on top of each other while wrapping as a “bundle” as long as each plate has at least one full sheet between it and the next plate.
Loading plates into the box vertically
- Stand each wrapped plate on its edge in the box, like records in a crate.
- Line them tightly side by side so there is minimal room to shift.
- Use additional folded paper or foam to fill any gaps at the sides.
- Once one “row” of plates is complete, add a layer of crumpled paper or a folded towel before starting the next row on top.
Your goal is to create a snug block of plates cushioned on all sides. When you gently shake the box, you should hear almost no movement.
Simple wording for plate box labeling
«Kitchen – Plates, Bowls – FRAGILE – This Side Up»
«Dining Room – China Plates – VERY FRAGILE – Unpack First»
How to wrap glasses, mugs, and stemware
Glasses and mugs are especially vulnerable because of handles, rims, and stems. Learning how to wrap glasses for moving will help you avoid cracks and broken handles.
General rules for glassware
- Pack glasses upright, not on their sides.
- Do not stack heavy items on top of glassware boxes.
- Leave enough time; rushing this step leads to breakage.
Wrapping everyday drinking glasses
- Place a glass on a sheet of packing paper near one corner.
- Stuff the inside of the glass with half a sheet of crumpled paper to support the interior.
- Roll the glass diagonally across the paper, tucking the sides in as you go so it is fully wrapped.
- Secure with a small piece of tape if needed.
Wrapping mugs and handled cups
- Place the mug on a sheet of paper and fill the interior with crumpled paper.
- Wrap one corner over the handle first, adding extra padding around the handle.
- Roll the mug, tucking in the remaining corners, so the handle is fully padded.
- For delicate handles, add a second sheet.
Packing wine glasses and stemware
Stemware is among the most fragile items in the kitchen. For expensive or irreplaceable pieces, many customers choose professional packing services to reduce risk. If you pack them yourself, take extra care:
- Gently fill the bowl of the glass with crushed paper; do not overstuff.
- Wrap the stem with a narrow strip of paper, forming a padded «cast» around the stem.
- Place the glass sideways on a stack of two sheets of paper and roll it, folding the paper in over the bowl and stem as you go.
- Wrap again with bubble cushioning or foam for added protection.
If you have cardboard cell dividers, place one fully wrapped glass into each cell. Fill any remaining gaps in each cell and at the top with paper so glasses cannot rattle.
Glassware packing checklist
- Glasses and mugs wrapped individually
- Interior of each glass/mug filled with paper
- Stems and handles cushioned separately
- Boxes padded at bottom, sides, and top
- Cell dividers used for tall or delicate stemware when available
Packing bowls, serving pieces, and odd-shaped items
Not everything in your kitchen is a simple plate or glass. Mixing bowls, serving dishes, teapots, and bakeware need special attention when you decide how to pack dishes for moving.
Nesting bowls and mixing bowls
- Wrap each bowl individually with one or two sheets of paper.
- Place the largest bowl on the paper, wrap, and tape if needed.
- Set a smaller wrapped bowl inside the larger one and add a layer of crumpled paper between them.
- Continue nesting 2–3 bowls, padding between each layer.
- Place the nested set vertically or upright in the box with additional cushioning around it.
Serving platters and bakeware
- Wrap platters in multiple sheets of paper or a combination of paper and bubble cushioning.
- Stand them vertically along the side of the box, cushioned by paper walls.
- For glass bakeware, double-wrap with paper and then add bubble around exposed corners.
Teapots, pitchers, and irregular items
- Remove lids where possible, wrap lids separately, and label them to match the base.
- Stuff interiors with paper to support the shape.
- Wrap spouts and handles individually with extra care.
- Place these items toward the top of the box, surrounded by lighter padding.
Example note to tape on a wrapped piece: «Tea set lid – goes with white floral teapot».
Box preparation and cushioning techniques
Even perfect wrapping will not protect fragile items if there is no shock absorption around them. Proper cushioning inside the box is as important as how you wrap each dish.
Creating a protective «nest» inside the box
- Line the bottom with 3–4 inches of crumpled paper or bubble cushioning.
- Place the heaviest items (plates, mixing bowls) on the bottom layer.
- Add a layer of crumpled paper between each layer of dishes or glassware.
- Fill all side gaps with folded paper, foam, or soft linens.
- Finish with a thick top layer of cushioning before closing the flaps.
The shake test
Once a box is full, close (but do not tape) the top and gently shake it.
- If you hear clinking or shifting, reopen and fill gaps with more paper or soft items.
- If the box feels too heavy to lift comfortably, remove a few pieces and start a second box instead.
Examples of good vs poor cushioning
| Cushioning quality | Description | Likely outcome in transit |
|---|---|---|
| Excellent | Thick bottom and top layers, sides fully padded, no rattling on shake test | Very low risk of chips or breaks |
| Fair | Some padding, light rattling, a few small gaps | Moderate risk if truck hits bumps or boxes are stacked tightly |
| Poor | Minimal padding, items touching directly, noticeable movement | High risk of chips, cracks, or shattering |
Using linens and soft items wisely
Towels, dishcloths, and pot holders can help fill gaps, but they should not fully replace packing paper. Use them as supplemental cushioning around already wrapped dishes, not as the only layer of protection.
Labeling and loading fragile kitchen boxes
Once you have finished packing plates for moving and wrapping glasses, you still have two critical steps: clear labeling and smart loading. These steps help your movers or helpers know how to treat each box.
What to write on each box
- Room: Kitchen or Dining Room
- Contents: e.g., Plates & Bowls, Glasses & Mugs, Stemware
- Handling: FRAGILE, THIS SIDE UP
- Priority: Unpack First for everyday dishes or coffee mugs
Label at least two adjacent sides and the top so the information is visible even when boxes are stacked.
Where to place dish boxes in the truck
- Keep dish barrels and fragile boxes on top of heavier boxes, not on the bottom.
- Avoid stacking more than 3–4 dish boxes high to prevent crushing.
- Place them against flat surfaces when possible and secure them with straps or between heavier but stable boxes or furniture.
If you are working with a professional moving crew from a company like Atlas Route Moving, the team will typically plan the load so fragile kitchen boxes are placed in safer areas of the truck. Clear FRAGILE labels help them spot which boxes need extra care.
Common dish-packing mistakes to avoid
Knowing what not to do is just as important as learning how to pack dishes and glassware correctly.
Frequently seen mistakes
| Mistake | Why it is a problem | Better approach |
|---|---|---|
| Stacking plates flat | Weight and impact focus on the center; plates crack more easily. | Stand plates vertically on edge with padding between each one. |
| Using large boxes for dishes | Boxes become too heavy and allow items to shift. | Use small boxes or dish barrels only. |
| Packing without enough paper | Items touch and clink together, leading to chips. | Wrap each item fully and fill gaps with crumpled paper. |
| Labeling only the top of boxes | Labels are hidden when boxes are stacked. | Label at least two sides plus the top. |
Other pitfalls to watch for
- Leaving space at the top of the box that can cave in under weight.
- Overpacking one box to save on supplies, making it hard to lift.
- Ignoring small cracks or chips that can worsen during the move.
- Mixing heavy cast-iron or appliances in the same box as plates and glasses.
A good rule: if you are unsure whether a box is adequately protected, add more padding or split the load into two boxes.
Timeline: when to pack dishes before moving day
Most households still need access to dishes until close to moving day. The trick is to stage your packing so you are not eating off paper plates for weeks, but you are also not frantically wrapping china at midnight before the truck arrives.
Suggested kitchen packing timeline
| Time before move | What to pack | Notes |
|---|---|---|
| 2–3 weeks | Rarely used serving dishes, special occasion china, extra sets of glasses | Use dish barrels for the most fragile items. |
| 1–2 weeks | Extra plates, mixing bowls, baking dishes, less-used mugs | Keep one set per person out for daily use. |
| 2–3 days | Everyday dishes and glasses, leaving only disposable items or a small essentials kit | Plan to switch to paper plates if needed. |
| Moving day / day before | Final coffee mugs, knives, and last-minute kitchen tools | Pack a small kitchen essentials box for the first night. |
Build a «first-night» dish box
Separate from the rest of your kitchen packing, prepare a small, clearly labeled box or tote with:
- 2–4 plates (or sturdy reusable plastic ones)
- 2–4 cups or mugs
- Basic utensils
- Dish soap and a sponge
- Paper towels or kitchen towel
Keep this box with you in your car or marked to load last and unload first.
When to hire professional packers for your kitchen
Even with a detailed guide, packing up an entire kitchen takes time, patience, and plenty of supplies. In many households, the kitchen is the single most time-consuming room to pack. That is why many customers ask Atlas Route Moving to handle just the fragile items or the entire kitchen.
Signs you may want professional packing help
- You have a large collection of dishes, crystal, or china.
- You are moving long-distance and want extra peace of mind.
- You are on a tight timeline and cannot spend hours wrapping each item.
- You have mobility or health concerns that make bending and standing difficult.
- You are simply more comfortable with professionals handling valuable items.
With professional packing services, trained crews use tested methods, dish barrels, and quality materials to protect fragile items efficiently. You can choose full-service packing or ask them to focus only on breakables like dishes and glassware.
What to expect if pros pack your dishes
- Walkthrough and planning of how many boxes and dish barrels will be needed.
- All packing supplies brought by the crew.
- Systematic wrapping and labeling by room and item type.
- Efficient completion, often in a fraction of the time it takes DIY.
How Atlas Route Moving can help protect your kitchen items
Atlas Route Moving offers professional, organized support whether you want to pack dishes yourself or hand the job over to an experienced crew. Our team regularly handles local and long-distance household moves, including packing, loading, transport, storage, and unpacking support.
If you prefer to take a DIY approach, you can still benefit from moving guidance, scheduling help, and a clear understanding of how your boxes will be loaded and handled. If you decide that packing plates for moving and carefully wrapping every glass is more than you want to take on, our packers can step in for part or all of your kitchen.
Helpful Atlas Route Moving services
Every move is different. Some customers want full-service packing, loading, and unpacking. Others just want help with the most fragile items so they can handle the rest. Atlas Route Moving can tailor services to your needs and budget.
Next steps to plan your move
- Review all moving services available.
- Use the moving cost calculator to estimate your budget.
- Check our service areas to confirm coverage for your origin and destination.
- Visit the Atlas Route Moving blog for more packing and planning tips.
- Request a free moving quote and ask about partial kitchen or fragile-only packing options.
Frequently asked questions
How many dishes should I put in one box?
It depends on the size and weight of your dishes, but for most households, 12–16 plates or bowls per small box or dish barrel is a practical limit. Focus on keeping the box comfortably liftable and fully cushioned rather than aiming for a specific number.
Is bubble wrap better than packing paper for dishes?
Packing paper is usually the most efficient and cost-effective option for how to pack dishes. Bubble wrap is helpful for especially delicate or valuable items, but for everyday plates and bowls, multiple layers of paper plus cushioning in the box are usually enough.
Can I use towels and clothes instead of packing paper?
Towels and clothes can supplement packing paper but should not fully replace it. Fabric compresses more than paper and may shift during transit. Wrap each dish in paper first, then use towels or linens to fill gaps and add extra cushioning.
How do I pack dishes if I am moving a short distance?
Even for short local moves, you should still wrap each dish and glass individually and pack plates vertically. The truck can hit the same bumps and turns whether you are going five miles or five hundred, so good technique still matters.
Should I leave dishes in the cabinet until the last minute?
It is better to pack most dishes 1–2 weeks before moving day and keep out only a small “essentials” set to use until the last couple of days. Waiting too long can leave you scrambling to pack fragile items when you are already tired and busy with other tasks.
How do professionals pack dishes differently?
Professional movers use sturdy dish barrels, high-quality paper, and consistent techniques, including vertical plate packing and tight cushioning. They also work systematically by category and box, which reduces mistakes and speeds up the process.
Do I need special boxes for dishes?
You do not have to use dish barrels, but they provide extra protection, especially for long-distance moves and heavy or delicate dishware. If you use standard small boxes, reinforce the bottom and use plenty of paper on all sides.
What should I keep with me instead of packing with the dishes?
Keep one small box or tote with everyday essentials such as a few plates and cups, basic utensils, a knife, dish soap, and paper towels. This box should travel with you or be loaded last so it is easy to access on arrival.
Can Atlas Route Moving pack just my dishes and glassware?
Yes, many customers ask for partial packing focused on fragile kitchen items. Atlas Route Moving can pack only your dishes, glassware, and other breakables while you handle the rest of the home, or provide full-service packing if you prefer.
How early should I book packing services?
Ideally, book packing services at least 2–3 weeks before your move date so your preferred schedule is available and there is time to plan how many dish barrels and boxes you will need.
Sources referenced in this guide
Professional advice on how to pack dishes and glassware safely comes from multiple practical sources, including:
- Federal Motor Carrier Safety Administration consumer guidance on household moves and protecting fragile items
- U.S. Department of Transportation moving guidance on packing and loading safety
- State transportation and consumer protection agency tips on hiring and working with movers
- Written moving estimates, service agreements, and bills of lading that describe packing responsibilities
- Carrier tariffs and valuation options related to customer-packed versus carrier-packed items
- Building management move-in and move-out requirements that may affect how and when packed boxes are moved
Related moving guides
This guide is general moving information, not legal, insurance, or regulatory advice. Moving requirements, pricing, access rules, and coverage options may vary by location, move type, building rules, and service agreement.