
How to Pack a Kitchen for Moving: A Room-by-Room Guide
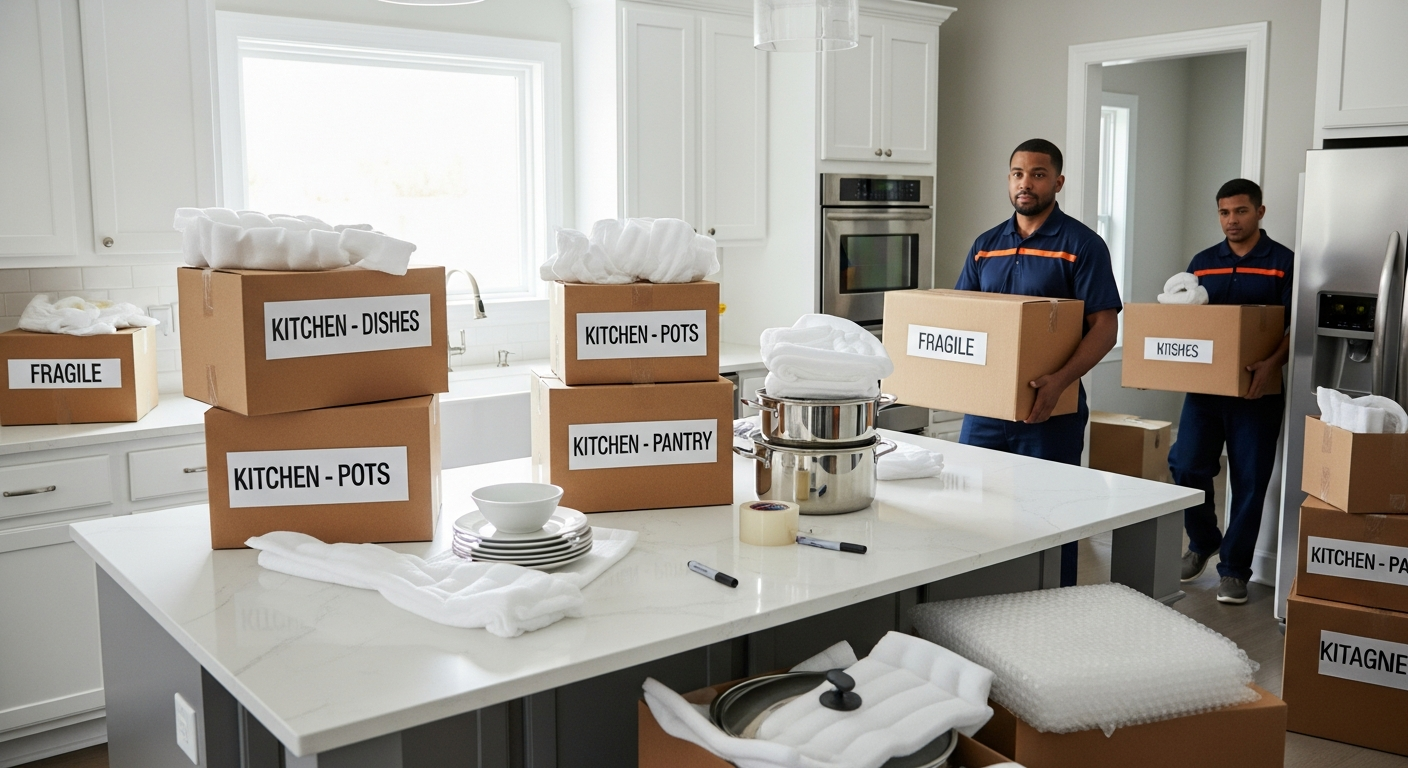
Of all the rooms in your home, the kitchen is usually the hardest to pack. It is filled with fragile glass, sharp knives, heavy pots and pans, awkward small appliances, and half-open food containers. If you leave it to the last minute, packing a kitchen for a move can quickly become overwhelming and messy.
With a clear plan, the right materials, and a room-by-room approach, you can pack your kitchen safely and efficiently while still keeping it usable as long as possible before moving day. This guide walks you through exactly how to pack a kitchen for moving, from purge and prep to the last box sealed and labeled.
As a professional moving company, Atlas Route Moving sees kitchen packing go smoothly when there is a logical order, good padding, and clear labels. We also see problems when boxes are overfilled, sharp items are exposed, or last-minute scrambling leads to broken dishes. The goal of this guide is to help you avoid those issues.
Below, you will find a complete kitchen packing checklist, fragile-first order, room-by-room tips, timelines, and practical examples. You will also see where professional packing services from Atlas Route Moving can step in if you prefer expert help with the most delicate or time-consuming items.
Key takeaways
- Start packing your kitchen 7–10 days before moving day, beginning with rarely used items and finishing with everyday essentials.
- Use sturdy small to medium boxes and plenty of paper or bubble wrap for dishes, glasses, and fragile items.
- Pack pots and pans nested together with padding between pieces, and keep boxes under a manageable weight.
- For small appliances, secure loose parts, wrap cords, and use original boxes when available.
- Use a clear labeling system that shows room, contents, and priority (e.g., «Kitchen – Everyday – Open First»).
- Avoid packing open liquids, aerosols, and perishable foods that can spill or spoil in transit.
- Professional packing services can handle delicate kitchen items if you are short on time or supplies.
Kitchen packing overview and timeline
When you think about how to pack a kitchen for a move, timing matters as much as technique. You still need to cook and eat leading up to moving day, but you also want everything safely boxed before the crew arrives. A staged approach works best.
Suggested kitchen packing timeline
Use the timeline below as a flexible template and adjust based on your household size and how much you cook at home.
| Time before move | What to pack | Notes |
|---|---|---|
| 10–14 days | Rarely used serving dishes, holiday items, extra utensils, backup appliances | Begin with top shelves and storage areas you do not access daily. |
| 7–10 days | Specialty cookware, baking pans, extra cutting boards, barware | Keep only one set of everyday cookware and dishes accessible. |
| 3–5 days | Most dishes, glassware, pantry staples, rarely used spices | Switch to disposable plates or a basic «move-out» kit. |
| 1–2 days | Everyday dishes, last pots and pans, fridge and freezer items | Leave out a small essentials box for the first night in the new home. |
| Moving day | Cleaning supplies, trash can, any final food you are taking | Confirm cabinets and drawers are empty before movers leave. |
This schedule helps you balance everyday use with an organized packing process. It also fits well with professional local moving services or long-distance moving services, where crews often plan loading based on which rooms are fully packed first.
Kitchen packing priorities
- Non-essential items and decor go first.
- Fragile items get extra time and attention.
- Everyday cooking tools and dishes are last to be boxed.
- Cleaning supplies and trash remain accessible until moving day.
Essential supplies for packing a kitchen
Before you start packing a kitchen for a move, gather the right materials. The kitchen is where quality boxes and padding matter most because of the weight and fragility of what you are packing.
Recommended kitchen packing materials
| Material | Purpose | Tips |
|---|---|---|
| Small and medium moving boxes | Dishes, glasses, pantry items, small appliances | Avoid large boxes for heavy kitchenware to prevent overloading. |
| Dish pack boxes with dividers (optional) | Extra protection for plates, bowls, glasses, stemware | Ideal for long-distance moves or valuable dishware. |
| Packing paper / newsprint | Wrap individual items and fill empty spaces | Use clean paper to avoid ink transfer onto dishes. |
| Bubble wrap | Fragile, delicate, or oddly shaped pieces | Great for glass lids, ceramic bakeware, and electronics. |
| Stretch wrap / plastic wrap | Secure lids, keep drawers closed, bundle utensils | Do not apply directly to wood finishes for long periods. |
| Packing tape and dispenser | Seal boxes and reinforce bottoms | Double-tape heavy boxes for added strength. |
| Permanent markers | Label boxes by room, contents, and priority | Use large, clear writing on multiple sides of each box. |
Optional protective materials
- Foam pouches for plates and glasses
- Cardboard dividers for stemware and mugs
- Zip-top bags for small parts, hardware, and spice containers
- Painter’s tape to secure appliance doors and lids without residue
- Dish towels and oven mitts as extra padding around fragile items
If you prefer not to source materials yourself, Atlas Route Moving can provide professional-grade supplies as part of our packing services or full-service moving support.
Step 1: Declutter and organize your kitchen
Before you think about how to pack a kitchen box by box, reduce how much you need to move. Decluttering not only cuts moving costs but also makes unpacking at your new home faster and more organized.
What to sort and reduce
- Duplicate utensils and gadgets: Keep your favorites and donate or discard extras you rarely use.
- Old plastic containers: Recycle stained, cracked, or lid-less containers rather than packing them.
- Expired pantry items: Check dates on canned goods, spices, baking supplies, and condiments.
- Chipped or damaged dishes: Decide whether they are worth moving or should be replaced later.
- Single-purpose gadgets: If it has not been used in a year, consider leaving it behind.
Simple decluttering checklist
- Clear one cabinet at a time to avoid spreading items across the whole room.
- Create three zones on your counter: Keep, Donate/Give Away, and Trash/Recycle.
- Be honest about how often you use specialty items or duplicates.
- Set a timer for 30–45 minutes per session to stay focused.
- Box up donations immediately so they do not drift back into the «keep» pile.
Example decision rule: «If I would not pay to ship this item across the country, I probably do not need to pack it for a local move either.»
Step 2: Fragile-first packing strategy
Once clutter is out of the way, it is time to plan what gets packed first. A fragile-first strategy gives you more time and focus for items that are harder or more expensive to replace.
Suggested fragile-first order
| Packing order | Item category | Why pack now |
|---|---|---|
| 1 | Decorative glasses, display dishes, barware | Rarely used but fragile, easy to box early. |
| 2 | Fine china, specialty plates, serving platters | High value or sentimental pieces need careful wrapping. |
| 3 | Glass bakeware and lids, ceramic casseroles | Heavy and fragile; best packed in small boxes. |
| 4 | Everyday dishes and bowls (except 1 set) | Box the bulk early, leave a minimal set in use. |
By the time you get to less fragile categories like pots and pans, utensils, and pantry items, you will have momentum and more confidence in your packing technique.
How to pack dishes and glassware
Dishes and glassware are often the first items people worry about when learning how to pack a kitchen. Proper technique makes a big difference in preventing chips, cracks, and breaks.
General rules for fragile items
- Use small, sturdy boxes and pad the bottom with a thick layer of crumpled paper.
- Wrap each dish, bowl, or glass individually in paper or bubble wrap.
- Place heavier items at the bottom and lighter ones toward the top.
- Fill all empty spaces with paper so items cannot shift during transit.
- Mark boxes as Fragile and note This Side Up clearly.
Packing plates and bowls
- Lay a stack of sheets of packing paper on a flat surface.
- Place a plate in the center, fold paper over it, and stack 3–4 plates in one bundle.
- Wrap the bundle again until fully covered and secure with tape if needed.
- Stand plates on their edges in the box (like records), not flat, to reduce pressure.
- Repeat for bowls, stacking 2–3 per bundle depending on size and weight.
Sample box label: «Kitchen – Plates & Bowls – Fragile – Medium»
Packing glasses and mugs
- Stuff the inside of each glass or mug with crumpled packing paper.
- Wrap the outside with additional paper or a foam pouch.
- Place glasses upright in rows with dividers if available.
- Surround edges and top with extra paper for a snug fit.
- For stemware, use dividers or wrap stems separately in extra padding.
For more detail on dish and glass techniques, you can also review the dedicated guide on how to pack dishes and glassware on the Atlas Route Moving blog.
How to pack pots and pans safely
Learning how to pack pots and pans is mostly about weight and efficient nesting. These items rarely break, but poor packing can lead to damaged non-stick coatings, bent lids, and boxes that are too heavy to move safely.
Steps to pack pots and pans
- Sort by size so you can nest smaller pans inside larger ones.
- Place a sheet of packing paper or a thin dish towel between each pot or pan to protect surfaces.
- Nest 3–4 pieces together depending on size and weight.
- Wrap the entire stack in paper or bubble wrap and tape loosely to hold.
- Pack lids separately, standing on edge with padding between each lid, or wrap and place on top of the box.
Best boxes for heavy cookware
Use small to medium boxes for cookware so they stay liftable. When packing a kitchen for a move, it is better to use more smaller boxes than a few oversized, overloaded ones.
| Cookware type | Box size | Packing tip |
|---|---|---|
| Cast iron skillets and Dutch ovens | Small | Pack at the bottom with plenty of padding; do not overfill. |
| Non-stick pans | Small or medium | Protect surfaces with paper or cloth between each pan. |
| Stainless-steel pots | Medium | Nest by size; fill empty pot space with light items. |
Using pots for extra storage
You can place small items like spice jars or utensil bundles inside larger pots to save space. Just be sure to wrap and cushion anything fragile and avoid overloading the box. Label clearly so you remember where those items are when unpacking.
How to pack small appliances
Knowing how to pack a kitchen also means figuring out how to protect small appliances like coffee makers, blenders, stand mixers, and toasters. These items combine fragile parts with electronics, so careful padding and secure cords are important.
General process for small appliances
- Unplug the appliance and ensure it is completely cool and dry before packing.
- Remove any detachable parts (blades, carafes, trays, attachments).
- Wrap cords neatly with a twist tie or zip tie and secure them to the appliance body.
- Wrap the main unit in packing paper or bubble wrap; wrap removable parts separately.
- Pack the main unit upright in a small or medium box and cushion all sides.
- Place labeled bags with small parts on top of or beside the appliance inside the same box.
Appliance-specific tips
| Appliance | Packing note | Special caution |
|---|---|---|
| Coffee maker / espresso machine | Empty water reservoir and grounds; wrap carafes separately. | Do not pack wet; moisture can cause mildew or damage. |
| Blender / food processor | Wrap blades carefully in paper and label as sharp. | Keep blades out of reach when unpacking. |
| Stand mixer | Remove bowl and attachments; pack in same box with padding. | Heavy; use a small, strong box and double-tape bottom. |
| Toaster / toaster oven | Shake out crumbs and clean tray before wrapping. | Avoid packing close to fabric without padding due to crumbs. |
If you kept the original boxes with molded inserts, they are ideal for moving. If not, quality packing paper and bubble wrap can offer similar protection when used generously.
How to pack food, pantry, and fridge items
Food is easy to overlook when packing a kitchen for a move, but it can cause leaks, odors, and pests if not handled properly. Your approach should differ for pantry items versus refrigerated and frozen foods.
Packing pantry items
- Group dry goods by type (baking, breakfast, snacks, canned goods).
- Check expiration dates and toss anything old or stale.
- Seal open packages in zip-top bags or airtight containers.
- Pack heavier items like canned goods at the bottom of small boxes.
- Use crumpled paper to cushion glass jars and prevent shifting.
Sample label: «Kitchen – Pantry (Baking) – Medium – Heavy»
Handling liquids and glass containers
- Avoid packing large open bottles of oil, vinegar, or sauces for long-distance moves.
- If you keep some liquids, tape lids closed and place bottles in sealed plastic bags.
- Pack glass jars upright and clearly label the box as This Side Up – Liquids.
Refrigerated and frozen foods
Most professional movers recommend that you avoid moving perishable refrigerated and frozen foods, especially on long-distance moves. Use up what you can in the week before your move and plan simple meals that finish what you already have.
- Defrost the freezer 24 hours before moving day.
- Wipe down and dry the interior of the fridge and freezer to prevent odors.
- If you are moving nearby and transporting some items yourself in coolers, pack them on moving day, not earlier.
Labeling and inventory system for your kitchen
A good labeling system makes a big difference in how easy it is to set up your new kitchen. When you think about how to pack a kitchen, think about how to unpack it too. Clear labels and a simple inventory help you find what you need right away.
What to include on each kitchen box label
- Room: Kitchen
- Category: e.g., Dishes, Pots & Pans, Pantry – Cans
- Priority level: Open First, Standard, or Storage
- Fragility: Fragile, Heavy, or This Side Up as needed
- Basic contents: list 3–5 key items (e.g., «Mugs, Coffee, Filters»)
Example label wording: «Kitchen – Everyday Dishes – Fragile – Open First»
Simple kitchen inventory table
For larger homes or long-distance moves, a quick inventory helps you track your kitchen boxes and know where essentials are. You can jot this down in a notebook or a simple spreadsheet.
| Box number | Label | Key contents |
|---|---|---|
| K-1 | Kitchen – Everyday Dishes – Open First | 4 plates, 4 bowls, 4 glasses, kids cups |
| K-2 | Kitchen – Pots & Pans | Saucepan set, frying pans, lids |
| K-3 | Kitchen – Pantry – Baking | Flour, sugar, baking powder, spices |
This simple system also helps you confirm that all kitchen boxes are unloaded at your new home and placed in the right room.
Common kitchen packing mistakes to avoid
Even people who follow a room-by-room guide still run into trouble if they rush or overlook small details. Being aware of common mistakes will help you pack a kitchen for a move more safely.
Frequent kitchen packing errors
- Using boxes that are too large and heavy for dishes or cookware.
- Stacking plates flat instead of on edge.
- Leaving sharp knives loose in a box without protective sheaths.
- Packing liquids without sealing lids and bags, causing leaks.
- Waiting until the day before the move to start on the kitchen.
- Forgetting to label boxes clearly, especially «Open First» essentials.
Mistakes and better alternatives
| Common mistake | Risk | Better approach |
|---|---|---|
| Overpacking one giant «kitchen» box | Box may break; hard to lift and move safely. | Use multiple small/medium boxes by category. |
| Loose knives in a utensil drawer box | Injury while unpacking; damage to blades. | Wrap knives in cardboard sleeves and label clearly. |
| No padding on box bottoms | Greater impact on fragile items when boxes are set down. | Always start with a thick layer of crumpled paper. |
| Packing sticky or open containers loose | Spills can ruin boxes and other items. | Seal in bags and consider not moving certain liquids. |
Hiring professionals for fragile kitchen items can also help you avoid these issues. Atlas Route Moving crews are trained to pack glass, china, and delicate cookware efficiently and safely.
Preparing your kitchen before movers arrive
On moving day, a well-prepared kitchen saves time and reduces stress. Whether you packed yourself or used professional packing services, a quick final check ensures everything is ready for loading.
Kitchen prep checklist for moving day
- Confirm all cabinets, drawers, and the pantry are empty.
- Set aside a clearly labeled «Kitchen – Open First» box with basics: a few plates, cups, utensils, dish soap, and a dish towel.
- Empty and clean the refrigerator and freezer; leave doors open a crack to air out if the unit is staying.
- Disconnect and wipe down small appliances that will be moved.
- Place all kitchen boxes in one area or clearly label them so movers can deliver them to the right room.
- Set aside a separate bag or box for cleaning supplies you will keep with you, not on the truck.
Example essentials box contents: «2 plates, 2 bowls, 2 mugs, disposable cutlery, dish soap, sponge, paper towels, trash bags, coffee, and a simple pan.»
What to keep with you, not on the truck
For safety and practicality, some kitchen-related items are better moved in your own vehicle rather than in a moving truck.
- Flammable items such as charcoal, lighter fluid, and certain cleaners.
- Open liquid cleaners that might leak.
- Valuable or sentimental pieces (heirloom dishes, rare glassware) if you prefer to handle them personally.
- Snacks, drinks, and basic paper goods for moving day and the first night.
How Atlas Route Moving can help with kitchen packing
Even with a detailed guide on how to pack a kitchen, not everyone has the time, supplies, or comfort level to handle every fragile item. That is where professional help can make a real difference.
When to consider professional packing
- You have a large kitchen with extensive dishware, glassware, or cookware collections.
- You are on a tight schedule and need your kitchen usable as long as possible.
- You are planning a complex long-distance move where extra protection is especially important.
- You would rather focus on work, family, or other parts of the move.
Atlas Route Moving offers flexible options, from packing just your fragile kitchen items to handling full-home packing. Our crews use professional-grade materials and proven techniques to protect dishes, glasses, pots and pans, and small appliances, and we label boxes clearly so your new kitchen is easier to set up.
Helpful Atlas Route Moving services
To see how kitchen packing fits into your overall move, you can also explore general moving advice on the Atlas Route Moving blog.
Frequently asked questions
How early should I start packing my kitchen before a move?
Aim to start 7–10 days before moving day. Begin with items you rarely use, like special serving dishes and seasonal bakeware, and leave everyday essentials for the last 1–2 days. This approach lets you keep cooking while still making steady progress.
What boxes are best for kitchen items?
Small and medium boxes are best for most kitchen items. Use small boxes for heavy dishes, glassware, and canned goods, and medium boxes for lighter items like plastic containers or pantry goods. Avoid large boxes for fragile or heavy items to keep weights manageable.
How should I pack knives safely?
Wrap each knife in several layers of packing paper and then in a dish towel or piece of cardboard. Bundle knives together with handles aligned and label the bundle clearly as «Sharp Knives» before placing it in a box. Always store them on their side, never loose.
What is the safest way to pack glasses and stemware?
Stuff each glass with paper, wrap the outside, and use dividers if possible. Place glasses upright in a small or medium box padded on all sides, and fill gaps with paper so nothing moves. Label the box as Fragile and This Side Up.
Can I pack food from my pantry and fridge?
You can pack sealed, non-perishable pantry items as long as they are not expired. Seal open packages in bags. For refrigerated and frozen foods, try to use them up before moving. Perishables generally should not go on the moving truck; transport any you keep in coolers yourself.
How do I pack small appliances like coffee makers and blenders?
Unplug and clean each appliance, remove detachable parts, and wrap cords securely. Wrap the main unit and parts separately in paper or bubble wrap, then pack them together in a small or medium box with padding on all sides. Keep glass pieces well cushioned.
What should go in my «open first» kitchen box?
Include a few plates, bowls, cups, basic utensils, a small pan, dish soap, a sponge, paper towels, trash bags, and coffee or tea supplies. Label the box «Kitchen – Open First» and keep it easily accessible during the move.
Can movers pack my kitchen for me?
Yes. Atlas Route Moving offers professional packing services, from fragile-only to full kitchen packing. Crews bring materials, pack dishes, glassware, pots, pans, and appliances, and label boxes clearly so your new kitchen is easier to set up.
How can I keep my kitchen usable as long as possible before the move?
Create a «move-out» kit with a limited set of dishes, utensils, and one or two pots or pans. Pack everything else in stages starting with rarely used items. Switch to simple meals and disposable plates in the last days before moving day.
How do I estimate the cost of packing and moving my kitchen?
Kitchen costs depend on how much you have, how far you are moving, and whether you choose professional packing. You can use the Atlas Route Moving moving cost calculator and then request a free moving quote for more precise pricing.
Sources referenced in this guide
Kitchen packing recommendations in this guide are based on practical experience from professional moving crews at Atlas Route Moving and general industry practices used across the moving sector.
For additional background, customers often review guidance from resources such as Federal Motor Carrier Safety Administration consumer guidance, U.S. Department of Transportation moving guidance, and state transportation or consumer protection agencies. Building management move-in and move-out requirements, written moving estimates, and service agreements can also affect how and when your kitchen is packed and loaded.
Related moving guides
Next steps and how to get help
If you follow this room-by-room guide for how to pack a kitchen, you will be in a strong position for moving day: boxes organized, fragile items protected, and essentials ready for your first night in the new home.
If you would rather hand off the most time-consuming parts, Atlas Route Moving can customize support around your needs. You can explore our full range of moving services, see where we operate in our service areas, use the moving cost calculator, or request a free moving quote to talk through your kitchen packing plan with our team.
This guide is general moving information, not legal, insurance, or regulatory advice. Moving requirements, pricing, access rules, and coverage options may vary by location, move type, building rules, and service agreement.