
How to Pack Lamps and Lighting Fixtures
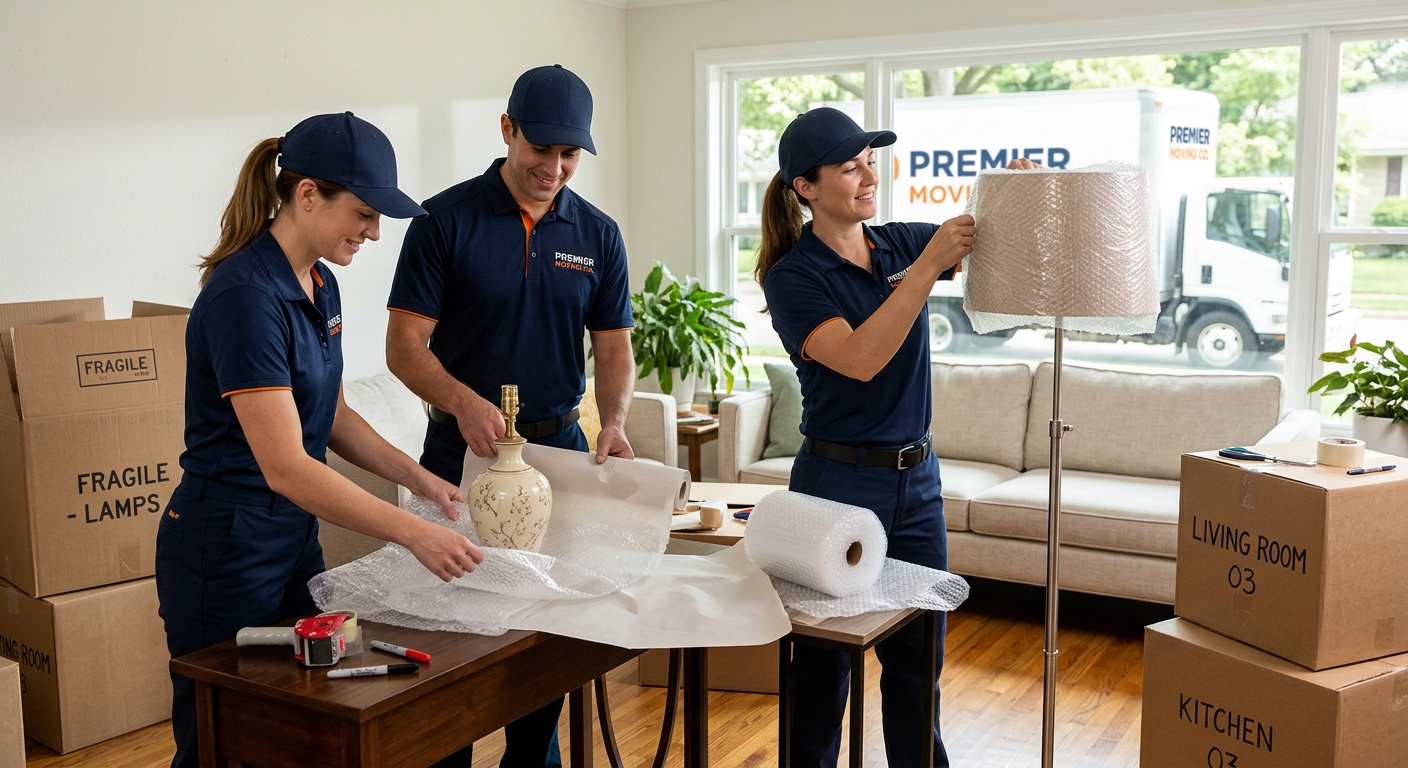
Lamps and lighting fixtures are often the first things to break during a move. Thin glass, delicate shades, fragile bulbs, and long bases do not handle bumps and pressure well. But with the right plan and packing method, you can move your favorite lamps safely to your new home.
This guide explains exactly how to pack lamps and lighting fixtures step by step. You will learn how to separate lamp parts, protect delicate shades, wrap bases and light fixtures, choose the right boxes, label everything clearly, and decide when professional packing help is worth it.
Whether you are packing a single bedside lamp, figuring out how to move a floor lamp from your living room, or disassembling a dining room chandelier, the techniques here are the same methods Atlas Route Moving crews use when preparing fragile lighting for transport.
Use this guide as a checklist while you pack so that your lamps arrive ready to plug in and brighten your new place instead of showing up cracked, dented, or bent.
Key takeaways
- Always separate the lamp base, shade, harp, and bulb before packing. Each part should be wrapped and boxed separately.
- Use clean, soft packing paper for shades and never use newspaper directly on fabric or white materials because ink can transfer.
- For tall items, such as when you move a floor lamp, remove the pole sections if possible and pack them in long, well-padded boxes.
- Fill empty spaces in boxes with crumpled paper or soft linens so that lamps cannot shift during transit.
- Mark lamp and shade boxes as fragile and top-load so movers know not to stack heavy items on them.
- When in doubt, let professional packers handle the most fragile or expensive lighting fixtures.
- Plan your lamp packing 3–7 days before moving day so you still have enough light while you prepare your home.
Why lamps are difficult to move
Understanding why lamps and lighting are vulnerable will help you decide how to pack lamps properly and which items need extra care.
Multiple fragile parts in one item
Most lamps combine several fragile materials in one piece: thin glass, ceramic, hollow metal, small screws, and delicate shades. Each part reacts differently to impact, pressure, and vibration during a move.
- The base can chip, crack, or dent if it shifts against other items.
- The neck or stem can bend under pressure if it is not supported.
- The harp and finial are small and easy to lose.
- The cord can tangle, kink, or get pinched.
- Lampshades crush or crease easily, especially fabric and paper shades.
Awkward shapes and top-heavy designs
Many lamps are tall, narrow, and top-heavy. When you move a floor lamp or a large table lamp, the center of gravity can make it tip if it is not packed in a snug, stable box. Without proper padding, even a minor tip in the truck can lead to damage.
Bulbs and sockets are especially fragile
Bulbs are not meant to handle heavy vibration. Even if the glass survives, the inside filament can break. Sockets and switches can crack or loosen if they absorb force during transit.
Why good packing matters
Replacing a damaged lamp is not always simple. Older lamps, designer fixtures, and sentimental pieces can be hard or impossible to replace. Taking the time to learn how to pack lamps correctly reduces your risk of:
- Broken or cracked bases
- Torn or dented shades
- Lost hardware or harps
- Electrical problems from damaged cords or sockets
Supplies you need to pack lamps and lighting
Before you start packing lamps for moving, gather the right supplies. Having everything on hand keeps you from improvising with materials that do not protect your items.
Checklist of lamp packing materials
- Small and medium moving boxes for lamp bases
- Dedicated lampshade boxes (new or gently used) for shades
- Long or telescoping boxes for tall lamps and fixtures
- Clean, plain packing paper (unprinted)
- Bubble wrap or foam wrap for bases and glass parts
- Stretch wrap to hold padding in place (optional)
- Packing tape and a tape dispenser
- Permanent markers for labeling
- Zip-top bags for small hardware and finials
- Foam sheets or cardboard dividers for separating items in a box
Recommended boxes by lamp type
Use this guide to choose box sizes when deciding how to pack lamps of different shapes and heights.
| Lamp or fixture type | Recommended box style | Notes |
|---|---|---|
| Small table lamp | Small or medium moving box | Pack base in its own box with padding on all sides. |
| Large table lamp | Medium moving box or tall double-walled box | May require custom padding or double boxing. |
| Floor lamp (disassembled) | Long lamp box or wardrobe-style box | Wrap pole sections individually and bundle. |
| Lampshade (small) | Dedicated lampshade box or medium box | Only light items in the box with the shade. |
| Lampshade (large or drum) | Oversized lampshade box | May fit multiple nested shades. |
| Pendant or chandelier | Double-walled specialty or custom box | Often best left to professional packers. |
Choosing between DIY and professional supplies
You can often reuse clean boxes and soft linens, but avoid thin, worn, or crushed boxes for fragile items. If you prefer not to track down materials, Atlas Route Moving can provide high-quality boxes and professional packing services so your lamps and lighting are wrapped with the same standards our crews use every day.
How to prepare lamps before packing
Preparation is the most important step when learning how to pack lamps. Rushing this part leads to missing pieces and damaged shades.
Step 1: Unplug and cool down
- Turn off and unplug lamps.
- Let them cool completely if they were recently on. Hot bulbs and warm shades are more prone to damage.
Step 2: Clear a packing workspace
Set up a table or clean floor area with a blanket or cardboard under your items. This protects your lamp if it tips while you are disassembling it.
Step 3: Disassemble the lamp
Most standard table lamps follow the same basic structure. Before packing lamps for moving, separate all pieces so each can be wrapped individually.
- Remove the bulb and set it aside.
- Unscrew and remove the finial (top decorative piece).
- Lift off the lampshade.
- Squeeze and remove the harp (the metal frame that holds the shade).
- For some floor lamps, unscrew the pole sections if the design allows it.
Place all small hardware (finials, screws, clips) into a zip-top bag. Keep one bag per lamp so you can reassemble quickly at your new home.
Example label: «Living room blue lamp – finial & screws»
Step 4: Dust and inspect parts
Wipe dust off bases and shades with a dry, soft cloth. This keeps dirt from rubbing into finishes or fabric during the move.
As you inspect each part, note any existing damage. If your movers are handling the packing, show them any pre-existing cracks or weak spots so they can reinforce those areas.
How to pack lamp bases step by step
Now that your lamp is in separate parts, focus on the base first. The base is usually the heaviest and sturdiest piece, but it still needs good cushioning.
Step 1: Wrap the cord
- Loosely coil the electrical cord.
- Secure it with a soft twist tie or a small strip of painter’s tape.
- Avoid tight knots, which can damage the cord.
You can tape the coiled cord to the base so it does not dangle and catch on other items while packing.
Step 2: Pad and wrap the base
- Place the base upright on a stack of packing paper sheets.
- Bring the paper up around the sides and over the top, tucking gently as you go.
- For ceramic, glass, or thin metal bases, add a layer of bubble wrap on top of the paper.
- Secure the wrapping with tape, but never tape directly to the lamp finish.
For very delicate finishes, you can first wrap the lamp with a soft cloth or foam sheet and then add paper and bubble wrap.
Step 3: Prepare the box
- Reinforce the bottom seam of the box with extra packing tape.
- Crumple packing paper and create a 2–3 inch cushion on the bottom.
- Place heavier items, such as lamp bases, in the bottom of the box, leaving space between each one.
Step 4: Place the base in the box
Stand the wrapped base upright in the box if possible. Fill any gaps around the sides with crumpled paper. The goal is to prevent the base from sliding in any direction if the box is moved.
Step 5: Add lightweight items only (if needed)
If there is space left in the box after the base is secure, you can add lightweight, non-fragile items on top, such as:
- Throw pillows
- Linens
- Soft, lightweight decor
Do not place books, tools, or heavy kitchen items in the same box as lamp bases.
Step 6: Fill and label
- Fill remaining space at the top with crumpled paper so nothing can move.
- Close and tape the box securely.
- Label the box on multiple sides with:
- «Lamp base – fragile – this side up»
- Room name (e.g., «Master bedroom lamp base»)
How to pack lampshades without crushing them
Lampshades are surprisingly delicate. The frame can bend, and fabric or paper can crease permanently. Learning how to pack lampshades properly is just as important as packing the bases.
Rule #1: Shades never go with heavy items
The biggest mistake people make when they pack lampshades is to treat them like any other household item and tuck them into half-full boxes with heavy objects. Shades should only share a box with other light, soft contents.
Step 1: Choose the right box
- Pick a box slightly larger than the shade in every direction.
- For multiple shades, choose a box tall enough for nesting (placing one shade inside another).
- If you cannot find a box that fits, consider a specialty lampshade box or ask your moving company to provide one.
Step 2: Wrap the lampshade
- Lay several sheets of clean packing paper on a flat surface.
- Place the shade on its side on the paper.
- Gently roll the shade in the paper, folding excess paper into the open ends.
- Use small pieces of tape to secure the paper to itself, not to the shade.
Avoid using newspaper or colored tissue directly on the shade, especially for white or light-colored fabrics. Ink and dye can transfer and leave permanent marks.
Step 3: Nest shades when possible
If you have multiple shades with similar shapes, you can save space by nesting them.
- Wrap each shade individually in paper.
- Place the smallest wrapped shade inside the next size up.
- Continue until a set of shades fits comfortably together without force.
Step 4: Prepare and pack the shade box
- Add a thin layer of crumpled packing paper to the bottom of the box.
- Place the wrapped shade upright or on its side, depending on what fits best.
- Fill small gaps around the shade with more crumpled paper or soft, lightweight linens.
Do not overpack the box. The shade should not bulge against the sides of the box, and there should be no pressure on the frame.
Step 5: Label the box clearly
- «Lampshades – fragile – top load only»
- Room name, if specific (e.g., «Dining room chandelier shades»)
Top-load labels tell the crew to keep these boxes on top of stacks in the truck so heavier boxes are not placed on them.
How to wrap light fixtures and chandeliers
Ceiling lights, pendants, and chandeliers often require more time and care than standard lamps. They may include glass shades, hanging crystals, and multiple arms. If you are not comfortable handling electrical fixtures, ask a qualified person to remove them before packing.
Step 1: Remove bulbs, globes, and glass pieces
- Turn off power to the fixture at the breaker before removal, if you are taking it down yourself.
- Take off all bulbs, glass globes, and decorative elements.
- Wrap each glass piece separately in paper and then bubble wrap.
- Place wrapped glass into a small, well-padded box labeled with the fixture name.
Step 2: Protect the main body of the fixture
When you wrap light fixtures with multiple arms or delicate pieces, focus on preventing movement. Movement creates stress on joints and connections.
- Wrap the body of the fixture in soft packing paper or foam.
- Add bubble wrap over especially fragile sections.
- If there are dangling arms or crystals, gently secure them with soft ties or stretch wrap to keep them close to the main body.
- Do not overtighten; leave a little flexibility to avoid bending.
Step 3: Box the fixture
For small fixtures, a sturdy, double-walled box may be enough. For larger chandeliers or very intricate pieces, professional crating may be the safest option.
| Fixture size/complexity | Suggested packing approach | Notes |
|---|---|---|
| Small flush-mount light | Wrap and place in medium box with padding | Keep glass pieces separated by cardboard. |
| Standard pendant | Wrap body and glass; use tall, narrow box | Support the stem/rod with extra padding. |
| Multi-arm chandelier | Professional packing or custom crate recommended | High risk item; extra protection pays off. |
If you are unsure how to pack a particular fixture safely, speak with your mover about whether it should be professionally packed or crated. Atlas Route Moving offers professional packing services that can handle more complex fixtures.
How to pack different types of lamps
While the basic steps for how to pack lamps are similar, each lamp type has details to keep in mind.
How to pack small table lamps
- Follow the standard disassembly steps: remove bulb, shade, harp, and finial.
- Wrap the base in paper and bubble wrap.
- Pack one or two small bases per medium box with ample cushioning.
- Pack shades separately in a dedicated box.
How to move a floor lamp safely
Floor lamps are tall, awkwardly shaped, and often more fragile around the pole and base. To move a floor lamp without damage:
- Disassemble pole sections if possible, carefully unscrewing or unlocking joints.
- Wrap each pole section in paper, then bundle several sections together with more padding.
- Wrap the base separately as you would a table lamp base.
- Use a tall, narrow box or long lamp box to hold the pole bundle. Add padding on all sides.
- Label the outside clearly with «Floor lamp – fragile – long» and the room name.
How to pack desk lamps and task lighting
- Remove any clip-on shades or diffuser panels.
- Secure adjustable arms in a folded position with stretch wrap or tape over paper.
- Wrap the base and head with extra padding because these carry the most weight.
- Use small boxes and keep weight light for easier handling.
How to handle touch lamps or smart lamps
Touch lamps, dimmable lamps, and smart lighting contain sensitive electronics.
- Avoid wrapping them too tightly with plastic that could trap moisture.
- Use a layer of paper first, then bubble wrap loosely fitted around the base.
- Keep original manuals and any special remotes or controllers with your moving-day essentials.
Specialty and antique lamps
Antique, heirloom, or very high-value lamps often require additional care. You may want to:
- Photograph the lamp from several angles before packing.
- Note any existing chips or wear in a written inventory.
- Ask about upgraded valuation coverage when booking your move.
- Consider professional packing so responsibility is clearly documented.
Packing timeline and planning for lighting
Lighting is something you still need while you are preparing to move, so timing matters. You do not want to pack every lamp two weeks early and then struggle to see while packing other rooms.
When to pack lamps during your move
| Time before move | Lamp-related tasks | Notes |
|---|---|---|
| 2–3 weeks | Decide which lamps and fixtures you are taking versus donating or selling. | Measure large items and note any that need special boxes. |
| 7–10 days | Gather packing materials, confirm packing plan with your mover, and schedule any professional packing for fragile fixtures. | Ideal time to ask questions about how to pack lamps safely. |
| 3–5 days | Pack non-essential lamps (guest rooms, spare decor) and extra shades. | Leave key lamps in living areas and bedrooms for now. |
| 1–2 days | Pack remaining lamps and disconnect any fixtures being moved. | Use overhead lights or temporary lamps you can pack last. |
| Moving day | Confirm all lamp and shade boxes are labeled and loaded in a protected area of the truck. | Keep a flashlight or small lamp with you if you will arrive late. |
Planning lighting at your new home
As you pack, think ahead about where lamps and fixtures will go in your new space.
- Label boxes by both room and function (e.g., «Office task lamp», «Living room reading lamp»).
- Keep a simple drawing or list of which lamps you want in each room.
- Set aside a lamp for the new entryway so you have immediate light while unloading.
Costs, service options, and when to hire packers
Deciding whether to pack your own lamps or let professionals handle them depends on your budget, time, and comfort level with fragile items.
What affects the cost of packing lamps
Several factors influence how much it will cost for a mover to handle packing lamps and lighting for you.
| Cost factor | How it affects price | What you can do |
|---|---|---|
| Number of lamps/fixtures | More items mean more labor and materials. | Decide early which lamps you truly want to move. |
| Fragility and value | Delicate or high-value items may require extra padding, custom boxes, or crating. | Identify any antiques or designer pieces in advance. |
| Access and removal | Hard-to-reach fixtures or those that require an electrician can add complexity. | Have fixtures disconnected before movers arrive if needed. |
| Boxes and materials | Professional-grade boxes, paper, and wrap are built into packing costs. | Ask whether you can purchase supplies only if you plan to pack yourself. |
DIY vs. professional packing for lamps
To decide whether to hire help, compare your options honestly.
| Option | Pros | Considerations |
|---|---|---|
| DIY packing | Saves labor costs; you control how everything is wrapped; can use household linens as padding. | Takes time; risk if you are not familiar with how to pack lamps; may not be covered the same way under mover’s packing coverage. |
| Professional partial packing | Movers pack only fragile items like lamps, artwork, and dishes; you pack the rest. | Balances cost and peace of mind; you still need time to pack non-fragile items. |
| Full-service packing | Movers pack everything; efficient, organized, and typically uses optimal materials and methods. | Higher cost; you will need to prepare by decluttering and separating items in advance. |
If you prefer professional help, you can explore Atlas Route Moving professional packing services and discuss which lamps and fixtures you want our team to handle.
Common lamp packing mistakes and how to avoid them
Even with the best intentions, it is easy to make simple mistakes when packing lamps. Use this list as a quick check while you work.
| Common mistake | What can go wrong | Better approach |
|---|---|---|
| Packing lamp fully assembled | Shade crushes, harp or socket bends, bulb breaks inside. | Always remove shade, harp, finial, and bulb before packing. |
| Using newspaper on white shades | Ink transfers and permanently stains fabric or paper. | Use clean, unprinted packing paper or tissue. |
| Putting heavy items in shade boxes | Shade frames bend and fabric creases or tears. | Limit shade boxes to shades and very lightweight, soft items. |
| Not labeling boxes as fragile | Boxes can be stacked under heavier items or handled roughly. | Mark all sides with «Fragile» and «Top load» for lamps and shades. |
- Do not rush the disassembly step; tiny parts like finials are easy to lose.
- Avoid leaving bulbs in sockets; they can shatter and be hard to remove.
- Do not pack damp shades or lamps; moisture can cause mildew or damage finishes.
- Avoid overfilling boxes; bulging boxes are more likely to be crushed.
What to keep with you on moving day
Some lighting pieces are better traveling with you rather than in the moving truck, especially if you are moving long distance.
Items to carry yourself
- A small lamp for the first night in your new home
- Essential bulbs (at least a few extras)
- Remotes and smart lighting hubs or bridges
- Very sentimental or irreplaceable small lamps
- Lamp hardware bags if you are worried about losing them
Example box label for your car: «First night lighting – bedside lamp, bulbs, extension cord»
Why this matters
Arriving at a new home after dark without working lights makes unloading and settling in difficult. A simple plan for essential lighting makes the first evening more comfortable and safer.
Questions to ask your mover about packing lamps
As you compare movers or confirm details, ask specific questions about how they handle fragile items like lamps and lighting.
- Do you offer partial packing services for fragile items only?
If you are comfortable packing most of your home but want help with lamps and artwork, this is a good middle option. - How do you typically pack lamps and lampshades?
Listen for details that match the methods in this guide: separating bases and shades, using dedicated boxes, and labeling fragile items. - Can you provide boxes and materials for lamps if I pack them myself?
Some customers prefer to use professional-grade lampshade or lamp boxes even when packing on their own. - How are professionally packed lamps covered under your valuation options?
Coverage may differ depending on whether the mover or the customer packs an item. - Is there anything I should do before movers arrive to prepare my lamps?
Many movers appreciate when bulbs are removed, cords are coiled, and fragile items are grouped together.
Sample wording when talking with a mover: «We have several floor lamps and a chandelier we are worried about. Can your crew handle packing those, and what materials do you typically use?»
How Atlas Route Moving can help with packing lamps
Atlas Route Moving works with customers every day who want to protect fragile lamps and lighting fixtures during their move. Our crews are trained to handle delicate household items and use professional packing techniques similar to those outlined in this guide.
Depending on your needs, we can:
- Provide the right sizes of boxes and high-quality packing materials for lamps and lampshades.
- Pack only your most fragile items, such as lamps, artwork, mirrors, and dishes, while you handle the rest.
- Handle full-service packing for your entire home, including labeling and inventory.
- Coordinate with your overall move plan so lamp packing fits smoothly into your schedule.
Helpful Atlas Route Moving services
If you would like help deciding which items to pack yourself and which to leave to professionals, you can review our moving services, check your budget with our moving cost calculator, or request a free moving quote to discuss options with our team.
Frequently asked questions
Do I have to remove lampshades before moving?
Yes. Always remove lampshades from the base before moving. Shades should be wrapped and boxed separately from bases so they are not crushed or bent by the weight of the lamp.
Can I pack a lamp fully assembled in a large box?
Packing a lamp fully assembled is not recommended. The shade, harp, bulb, and socket are more likely to break if they stay attached. Disassemble, wrap each part, and box separately for the best protection.
What is the best way to pack lampshades?
Wrap each shade in clean packing paper, avoid newspaper, and place it in a slightly larger box with soft padding. Do not put heavy items in the same box. If shades nest naturally, wrap each one and stack them carefully.
How do I move a floor lamp without breaking it?
If possible, disassemble the floor lamp into pole sections, base, and shade. Wrap each part individually and place poles in a long box with padding on all sides. Clearly label the box as fragile and avoid stacking heavy items on it.
Should I leave bulbs in the lamp when packing?
No. Always remove bulbs before packing lamps or fixtures. Pack them separately in a small, padded box or choose to replace them at your new home. Leaving bulbs in sockets increases the chance of breakage and damage to the socket.
Can I use towels or blankets instead of bubble wrap?
Yes, you can use soft linens for extra cushioning around lamp bases or boxes, as long as you also protect delicate surfaces with clean paper. Avoid wrapping lampshades directly in textured fabrics that could snag or leave lint.
How many lamps can go in one box?
It depends on size and weight. Often one or two wrapped bases in a medium box is safest. For shades, you can pack multiple nested shades if each is wrapped and the box is not overcrowded. Always fill gaps with padding so items do not shift.
Are lamps covered if movers do not pack them?
Coverage depends on the valuation option you select and your moving agreement. In many cases, professionally packed items may qualify for different coverage than customer-packed boxes. Ask your mover how they handle lamps under each option.
When should I pack lamps in my moving timeline?
Non-essential lamps can be packed about 3–5 days before your move. Keep a few key lamps available until 1–2 days before moving day so you still have good lighting while packing other rooms.
Can Atlas Route Moving pack only my fragile items like lamps?
Yes, partial packing is a common choice. Many customers ask us to pack lamps, artwork, mirrors, and dishes while they handle less fragile items. You can discuss specific needs when you request a free moving quote.
Sources referenced in this guide
Guidance in this article reflects practical field experience from professional moving crews and general consumer recommendations from:
- Federal Motor Carrier Safety Administration consumer guidance on protecting household goods
- U.S. Department of Transportation moving guidance for interstate relocations
- State transportation and consumer protection agency materials about selecting movers and understanding coverage
- Typical written moving estimates, inventories, and bills of lading used in residential moves
- Carrier tariffs, valuation options, and service agreements commonly applied to fragile household items
- Building management move-out and move-in instructions for handling fixtures and common-area lighting
Related moving guides
For more moving tips and step-by-step preparation advice, you can also browse the Atlas Route Moving blog and review our service areas to confirm availability in your region.
This guide is general moving information, not legal, insurance, or regulatory advice. Moving requirements, pricing, access rules, and coverage options may vary by location, move type, building rules, and service agreement.