
How to Move a Treadmill and Home Gym Equipment
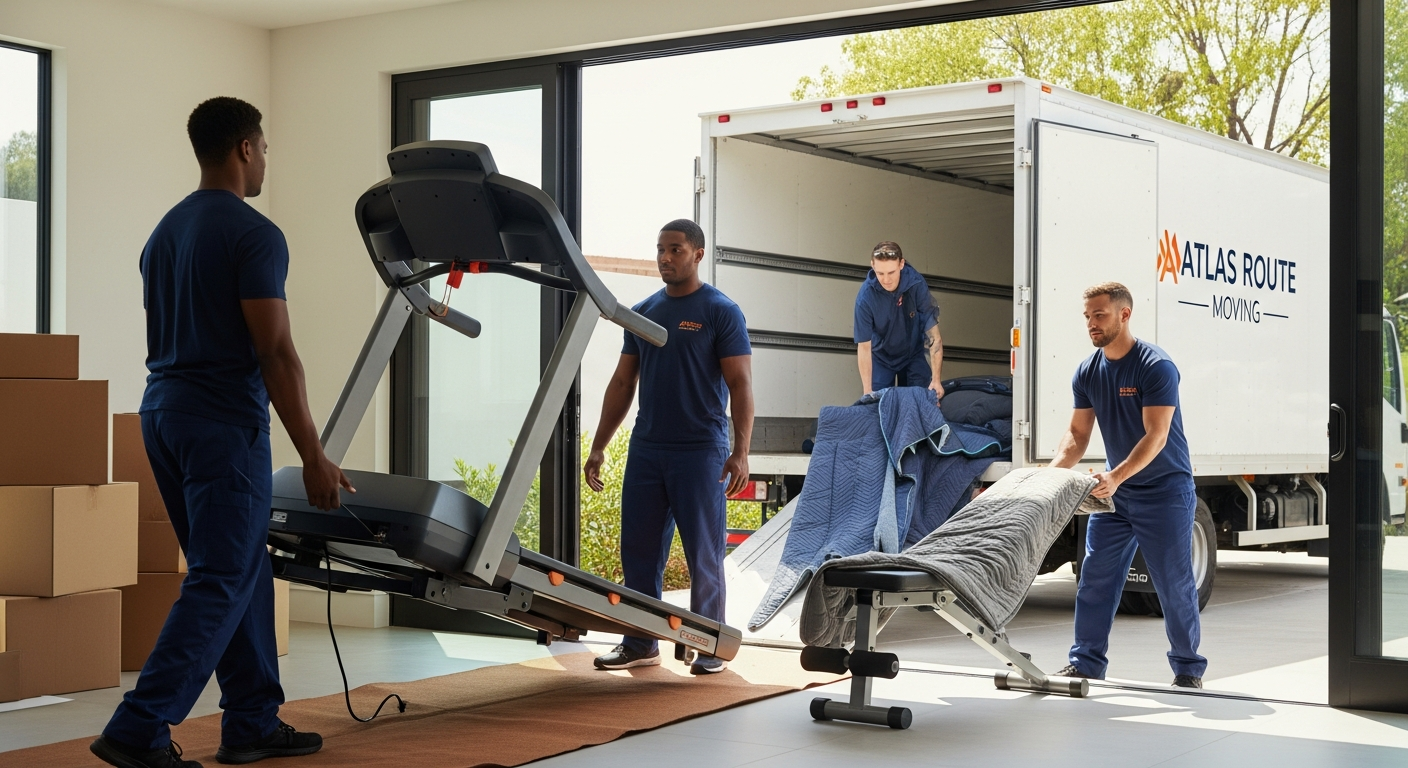
Moving a treadmill, weight rack, or full home gym is very different from moving a couch or a few boxes. Exercise equipment is heavy, awkward, and often packed with delicate electronics and moving parts. If it is not prepared and handled correctly, you can end up with damaged gear, scratched floors, or even a serious back injury.
This guide walks through how to move gym equipment step-by-step, from disassembling a treadmill and securing cables to packing free weights and protecting your floors. You will learn when a DIY approach can work, when to bring in professional movers, and how to get your gym set up quickly and safely in your new space.
Whether you are moving a single treadmill across town or relocating a full home gym with racks, benches, and cardio machines, the right plan makes a big difference. We will cover timelines, tools, safety tips, and practical checklists based on how professional movers handle these heavy items every day.
Atlas Route Moving regularly helps customers move home gyms as part of local moving services, apartment moves, and house moves. The same professional approach can help you avoid common mistakes and make moving day smoother.
Key takeaways
- Plan how to move gym equipment at least 2–3 weeks before your move so you can clear paths, protect floors, and gather tools and packing materials.
- Whenever possible, disassemble a treadmill and large machines into lighter pieces; label parts and take photos so reassembly is easier later.
- Use lifting straps, a furniture dolly, and proper team lifting techniques to reduce the risk of injury and protect both your body and your equipment.
- Pack free weights low and tight in small boxes or plastic bins; keep total box weight manageable so they can be carried safely.
- Lay down floor protection such as moving blankets or hardboard and pad corners and doorways to prevent scrapes and dents.
- Hire professional movers when equipment is very heavy, needs to go up or down stairs, or must be moved through tight spaces.
- On moving day, keep power cords, bolts, assembly tools, and owner's manuals together in a clearly labeled box or bag you carry yourself.
Why moving gym equipment is different
Home gym pieces are some of the trickiest items to move. Understanding why helps you treat them differently than standard household furniture.
Awkward weight and size
Treadmills, ellipticals, racks, and benches often pack a lot of weight into odd shapes. Much of that weight is concentrated at the base or one side, which makes them easy to tip if they are not supported correctly. Even if you are strong, awkward weight is what leads to pulled muscles and damaged stair rails.
Delicate electronics and moving parts
Treadmills and many cardio machines have digital consoles, wiring harnesses, belts, and motors. Yank or twist the wrong way, and you can break a connector or crack a console. That is why it is so important to lock, unplug, and secure moving parts before shifting anything.
Floor and wall damage risks
Metal feet, weight plates, and heavy frames can dig into hardwood floors, crack tiles, or leave marks on walls and door frames. Planning how to protect surfaces is just as important as planning how to protect the equipment.
Injury risk is higher
Because gym pieces are both heavy and awkward, the risk of back, knee, or finger injuries is much higher than with typical household boxes. Learning proper technique and knowing when to call professionals helps keep everyone safer.
How to plan your home gym move
Before you pick up a wrench, step back and create a simple plan. A little planning makes moving a treadmill and other exercise equipment much smoother.
1. Decide what is worth moving
Not every piece of equipment is worth the effort or cost to move.
- Is the treadmill older and unreliable?
- Are there damaged cables or frames on weight machines?
- Will the new space actually fit all your current equipment?
If you are paying movers by the hour, moving a failing treadmill may cost more than replacing it later.
2. Measure doorways, stairs, and the new gym space
Before you disassemble a treadmill or rack, measure:
- The length, width, and height of each large piece
- Doorways, stairwells, and halls along the path out
- Ceiling height and wall width in your new gym space
Compare your measurements and decide which items must be partially or fully disassembled to fit through tight spots.
3. Create a move sequence
Plan the order in which you will move items in and out of your home gym:
- Small items (mats, accessories, loose weights)
- Benches and small machines
- Weight plates and dumbbells
- Large frames, racks, and cardio machines
Moving small, breakable items first clears the space and keeps them out of the way when larger items are rolling through.
4. Build a simple timeline
Here is an example of a realistic timeline when you are figuring out how to move gym equipment before a household move.
| When | Tasks | Notes |
|---|---|---|
| 2–3 weeks before | Decide what to keep, measure doorways, gather tools and packing materials. | Schedule movers if needed; review owner's manuals. |
| 1 week before | Disassemble a treadmill and large machines, label parts, drain or clean equipment. | Stop using heavy cardio a day or two before so machines are clean and dry. |
| 2–3 days before | Pack weights, mats, small accessories; pad floors and doorways. | Keep essential tools and bolts in a clearly labeled container. |
| Moving day | Move large pieces with dollies and help; load last if you want quick setup at new home. | Keep electronics, cords, and manuals with you. |
Safety and injury prevention
Safety should be the first consideration when deciding how to move gym equipment on your own.
Use proper lifting technique
- Bend at your knees and hips, not your back.
- Keep the item close to your body to reduce strain.
- Do not twist your torso while lifting or carrying; turn your feet instead.
- Use team lifts for bulky or heavy items even if you think you can handle them alone.
Wear the right clothing and gear
- Closed-toe, non-slip shoes or work boots
- Work gloves for grip and hand protection
- Comfortable clothing that does not restrict movement or catch on equipment
- Back support belt if you will be lifting repeatedly
Control the path
Before you move anything heavy:
- Clear tripping hazards like loose rugs, small boxes, and clutter.
- Check for low-hanging light fixtures or tight turns.
- Communicate with your helpers so everyone knows the route.
“On three we rotate the treadmill toward the door, watch your side near the railing.”
Know when not to DIY
If any of these apply, consider hiring professional movers for your home gym:
- The treadmill or rack must go up or down narrow stairs.
- There is very limited clearance through doors or around corners.
- You have a history of back or knee issues.
- The equipment is extremely heavy or high-end and would be expensive to repair or replace.
Professional crews from companies like Atlas Route Moving bring the right equipment, experience, and insurance to handle difficult moves more safely.
Tools and materials you will need
Having the correct tools and supplies ready makes moving a treadmill or full home gym much more efficient.
Basic tools
- Allen wrenches / hex keys (often included with equipment)
- Socket set and ratchet
- Adjustable wrench
- Screwdrivers (Phillips and flathead)
- Zip ties or Velcro straps
Moving equipment
- Furniture dolly with a high weight rating
- Appliance dolly (for tall or very heavy pieces)
- Lifting straps or shoulder dollies
- Moving blankets and pads
- Ratchet straps or rope for securing items in the truck
Packing supplies
- Small, sturdy moving boxes for weights
- Heavy-duty plastic bins with lids (optional)
- Stretch wrap (plastic film)
- Bubble wrap or foam wrap
- Painter's tape and permanent markers for labeling
Floor and wall protection
- Corrugated cardboard or thick builder's paper
- Hardboard or Masonite sheets for very heavy equipment
- Corner protectors for doorways
The table below summarizes common tools and when they are most useful.
| Item | Primary use | Tips |
|---|---|---|
| Furniture dolly | Rolling treadmills, benches, and racks on flat surfaces. | Check weight rating; use straps to keep items from sliding. |
| Lifting straps | Team lifting large or tall machines safely. | Practice with a lighter item before using on the treadmill. |
| Stretch wrap | Securing cables, accessories, and protective padding in place. | Avoid wrapping directly over hot surfaces or vents. |
| Small boxes | Packing weights, attachments, and hardware. | Limit to 40–50 lbs per box to protect your back. |
How to disassemble a treadmill step-by-step
Moving a treadmill safely almost always starts with partial disassembly. Models vary, but most follow similar principles. Always consult your owner's manual first to confirm any specific instructions or lockout modes.
1. Power down and prepare electronics
- Turn off the treadmill using the power switch.
- Unplug the power cord from the wall and secure it with a Velcro strap or tape.
- If your treadmill has a safety key, remove it and store it with the power cord.
“Power cord and safety key for treadmill – keep with tools.”
2. Engage transport or lock mode (if available)
Some treadmills have a “transport” or “lock” mode that secures the deck and console. Follow the manufacturer's instructions to engage this mode before you begin disassembly. If your model folds, lock the deck securely in the folded position.
3. Remove accessories and loose parts
- Take off water bottle holders, reading racks, and tablet stands.
- Remove any attached fans or accessory trays.
- Put all small parts into a sealable bag labeled with the treadmill brand and model.
4. Detach the console (if needed)
On many treadmills, the console and upright arms create height and width that make it hard to get through doors. Removing these parts can make moving a treadmill much easier.
- Locate screws or bolts securing the console to the uprights.
- Support the console while removing fasteners so it does not drop.
- Disconnect any wiring harnesses carefully, pressing release tabs rather than pulling wires.
Wrap the console in bubble wrap or a moving blanket and tape it gently so you do not press on the screen. Label it clearly.
5. Remove or fold the uprights
Depending on your treadmill design:
- If the uprights fold, follow the manual to fold and lock them.
- If they are bolted to the base, use the correct tools to remove bolts and washers.
Label each upright (left/right) and keep bolts, washers, and any spacers in a labeled bag.
6. Prepare the base
The base of the treadmill is often the heaviest part. For moving:
- Ensure the walking belt is centered and secure.
- If the treadmill has built-in wheels, tilt and roll it following the manual's recommendations.
- If there are no wheels, lift onto a furniture dolly with help.
7. Wrap and secure for transport
- Wrap the base with moving blankets, paying attention to motor covers and corners.
- Use stretch wrap to hold blankets in place.
- Never lay heavy boxes or furniture on top of the treadmill base in the truck.
The process to disassemble a treadmill may feel detailed, but labeling and packing carefully will save time and frustration when you set up your new gym.
Moving ellipticals, bikes, and other cardio machines
Other cardio machines may not need as much disassembly as a treadmill, but they still require preparation.
Elliptical trainers
- Unplug and secure power cords.
- Lock pedals and arms in place if your model allows.
- Remove or fold consoles that add height or width.
- Detach moving arms on some models to create a narrower profile.
Because ellipticals can be tall and top-heavy, two or more people should tilt and guide the machine onto a dolly. Secure it with straps before rolling.
Stationary bikes and spin bikes
- Lower the seat and handlebars to their lowest positions.
- Remove water bottle cages, monitors, and clip-on accessories.
- Wrap the frame with blankets, then secure with stretch wrap.
Bikes are usually easier to navigate through doors, but flywheels are still heavy. Use good lifting technique and avoid carrying them alone up or down stairs.
Rowers and compact cardio gear
- Fold rowing machines if your model allows and secure the folded section.
- Wrap sliding seats and rail tracks to protect them from scratches.
- Pack smaller items like step platforms, resistance bands, and yoga blocks in boxes.
Packing free weights, racks, and benches
Weights are dense and unforgiving. If they are not packed properly, they can crush boxes, damage floors, or shift dangerously during transit.
General rules for packing weights
- Use small boxes or plastic bins; never load large boxes with weights.
- Reinforce box bottoms with extra tape.
- Distribute weight evenly so boxes are balanced.
- Fill gaps with towels or soft items so plates and dumbbells do not shift.
Dumbbells and kettlebells
- Place the heaviest dumbbells and kettlebells at the bottom of boxes.
- Wrap individual pieces in bubble wrap or towels if you want to protect finishes.
- Mark each box with “HEAVY – DUMBBELLS” or similar wording.
Weight plates and barbells
- Stack plates by size, separating stacks with cardboard or towels.
- Use multiple small boxes or bins instead of one large one.
- Wrap barbell ends and knurling to prevent scratches to other items.
Racks, cages, and benches
When you move a home gym with full racks or cages, disassembly is often required.
- Photograph connection points before taking them apart.
- Remove pull-up bars, safety arms, and J-cups.
- Label each piece with painter's tape (e.g., “Left upright”, “Top crossmember”).
- Organize bolts and washers in small labeled bags.
Flat benches can often be moved intact, while adjustable benches may need back pads or attachments removed and wrapped separately.
The table below shows a simple packing plan for common weight items.
| Item type | Best packing method | Notes |
|---|---|---|
| Dumbbells (5–25 lbs) | Small boxes, evenly distributed weight. | Wrap pairs together to keep sets organized. |
| Heavy dumbbells (30+ lbs) | One or two per box or bin. | Clearly mark as “VERY HEAVY”. |
| Weight plates | Stacked in small boxes or bins with padding. | Load plates flat, not on edge. |
| Barbells | Wrapped in blankets or foam, transported longwise. | Secure to truck wall to prevent rolling. |
Protecting floors, walls, and doorways
Floor and wall protection is easy to overlook when you are focused on how to move gym equipment, but it is one of the fastest ways to avoid damage costs.
Protecting floors
- Lay cardboard, builder's paper, or hardboard on hardwood or tile routes.
- Use moving blankets under heavier items when sliding them short distances.
- Avoid dragging bare metal or heavy weights directly across any flooring.
Protecting walls, corners, and doors
- Pad door frames and corners with blankets or corner protectors.
- Remove doors from hinges temporarily if machines barely fit through.
- Use spotters to watch blind corners and low ceilings.
“Slow down here, the treadmill motor cover is close to the stair rail.”
Securing in the truck
- Place heavy gym items on the floor against walls, not on top of boxes.
- Use ratchet straps to secure treadmills, racks, and benches to anchor points.
- Avoid stacking loose weights on top of anything that could crush or puncture.
DIY vs professional movers for gym equipment
Deciding whether to move home gym equipment yourself or hire pros depends on your gear, your home, and your comfort level with heavy lifting.
When DIY can make sense
- You have a few lighter pieces: a foldable treadmill, small bench, and some dumbbells.
- All routes are ground-level with few steps and wide doors.
- You have at least one or two strong helpers and access to a dolly.
When professional movers are the better choice
- You own a heavy non-folding treadmill, full rack, or commercial-grade machines.
- You must go up or down a flight of stairs or navigate tight turns.
- You have valuable flooring, such as newly installed hardwood.
- You are on a tight timeline and cannot afford delays or injuries.
Professional movers bring experience and the right equipment, which helps protect your investment in your home gym and your property.
Helpful Atlas Route Moving services
What affects the cost of moving gym equipment
If you plan to hire movers, it helps to understand the main cost drivers for moving exercise equipment. While each company sets its own pricing, most will look at similar factors.
Key cost factors
- Number and size of gym pieces
- Total weight of equipment and weights
- Stairs, elevators, and long carries
- Disassembly and reassembly time
- Distance between origin and destination
The table below summarizes how these factors can influence cost for a typical local move.
| Factor | Impact on cost | How to reduce cost |
|---|---|---|
| Number of items | More items mean longer loading and unloading time. | Sell or donate unused equipment before moving. |
| Stairs / tight access | Increases complexity and time; may require extra crew. | Disassemble large pieces so they fit more easily. |
| Disassembly needed | Professional disassembly and reassembly add labor time. | Handle basic disassembly yourself if you are comfortable. |
| Packing of weights | If movers pack weights, it adds to labor and materials. | Pack weights in small boxes before movers arrive. |
For a more personalized idea of potential costs, you can use the moving cost calculator or request estimates that include details about your home gym.
How to prepare before movers arrive
If you are hiring professionals, good preparation can reduce the time they spend on-site and help your move go more smoothly.
Confirm what movers will handle
Before moving day, clarify:
- Will the crew disassemble and reassemble the treadmill and racks?
- Do they provide all tools and protective materials?
- Are there any items they cannot move for safety or insurance reasons?
“We will disassemble the treadmill frame; please have weights boxed before we arrive.”
Complete your pre-move checklist
- Box and label weights, accessories, and small gym items.
- Remove and pack electronics, tablets, or screens that are not permanently attached.
- Clear at least a 3-foot path from your gym area to the exit.
- Set aside a “reassembly kit” with tools, manuals, and hardware.
Share important details with your mover
- Let them know about any tight stairwells or low ceilings.
- Mention fragile flooring that needs extra protection.
- Tell them if you want the gym items loaded last so they are unloaded first at the new home.
Moving-day checklist and what to keep with you
On moving day, a simple checklist keeps you organized and helps prevent lost parts or surprises.
Moving-day home gym checklist
- Confirm all gym electronics are unplugged and cables secured.
- Verify that treadmills and large machines are in transport or lock mode if available.
- Check that all weights are boxed, labeled, and sealed.
- Lay protective covering along main paths and in entryways.
- Take final photos of equipment condition before it leaves.
What to keep with you
Some items should travel with you in your personal vehicle instead of in the moving truck:
- Owner's manuals for treadmills, ellipticals, bikes, and racks
- Hardware bags labeled by equipment piece
- Power cords, safety keys, and small electronics
- Basic tool kit for reassembly at the new home
- Any specialty parts or attachments that would be hard to replace
Packing these in a clearly marked box such as “Gym setup – open first” makes it easier to reassemble everything when you arrive.
Common mistakes to avoid
Here are some frequent missteps when people move home gyms on their own, plus better approaches.
| Common mistake | Risk | Better approach |
|---|---|---|
| Dragging a treadmill across hardwood floors. | Scratches, gouges, and damaged flooring. | Use a dolly and floor protection; never drag bare metal. |
| Overloading big boxes with plates and dumbbells. | Broken boxes and higher injury risk. | Use small boxes and keep total weight reasonable. |
| Not labeling hardware or taking assembly photos. | Difficult reassembly, missing parts. | Bag, label, and photograph everything during disassembly. |
| Lifting heavy equipment alone. | Back, shoulder, or knee injuries. | Use a team lift or hire professional movers. |
Frequently asked questions
How do I move a treadmill without damaging it?
Start by unplugging it, engaging any lock or transport mode, and removing accessories. Disassemble a treadmill into the console, uprights, and base when possible. Wrap each part in moving blankets, use a dolly for the base, and secure everything in the truck so nothing can shift or fall onto it.
Can two people move a treadmill safely?
Two people can move many household treadmills, especially foldable models, if they use proper lifting technique and a dolly. Very heavy or commercial-grade treadmills, or ones that must go up or down stairs, are much safer to move with a professional crew.
Do I have to take my treadmill apart to move it?
Not always, but partial disassembly often makes things safer and easier. If the treadmill is too wide or tall for doors or hallways, or if it is very heavy, removing the console and uprights can help you avoid damage to both the machine and your home.
How should I pack dumbbells and weight plates?
Use small, reinforced boxes or sturdy bins. Place heavier items at the bottom, distribute weight evenly, and add padding between pieces to prevent shifting. Limit box weight to a level you can safely carry, usually around 40–50 pounds.
What is the best way to protect floors when moving gym equipment?
Lay down cardboard, builder's paper, or hardboard along the route. Use moving blankets under equipment when sliding it short distances, and never drag bare metal or heavy weights across hardwood or tile.
Should I hire movers just for my home gym?
If your home gym includes heavy machines, racks, or a large amount of weight, hiring movers even for a short-distance move can be worthwhile. They can bring dollies, straps, and experience that reduce the risks of property damage and injury.
Can movers disassemble and reassemble my gym equipment?
Many full-service moving companies can handle basic disassembly and reassembly of common treadmills, racks, and benches. Ask your moving company in advance what they can work on, whether there are additional labor charges, and if there are any equipment brands they do not service.
How early should I prepare my gym before moving day?
Aim to start preparing at least one to two weeks before your move. Decide what to keep, gather tools and supplies, and begin partial disassembly a few days in advance. Packing weights and accessories ahead of time saves a lot of time on moving day.
Is it safe to move a home gym in bad weather?
Moving heavy equipment in rain, snow, or ice is riskier because surfaces can become slippery. If you must move in poor weather, create dry paths using mats or runners, dry equipment as you load, and give yourself more time so no one rushes.
Sources referenced in this guide
This guide is based on practical experience from professional moving crews and common consumer guidance from several organizations and documents, including:
- Federal Motor Carrier Safety Administration consumer guidance
- U.S. Department of Transportation moving guidance
- State transportation and consumer protection agencies
- Building management move-in and move-out requirements
- Written moving estimates and bills of lading
- Carrier tariffs, valuation options, and service agreements
How Atlas Route Moving can help with your home gym
Handling heavy, awkward gym pieces is a routine part of many household moves. A professional team can save you time, effort, and risk, especially when stairs, tight spaces, and valuable flooring are involved.
Atlas Route Moving can incorporate your treadmill, weights, and other equipment into a broader household move or focus just on select heavy items. Crews can bring dollies, straps, and protective materials, and they are accustomed to navigating challenging spaces carefully.
If you are unsure whether to DIY or hire help, you can discuss your specific equipment, access points, and timing with a moving coordinator to find the approach that fits your situation.
Plan your home gym move with Atlas Route Moving
If you are planning a local move and want help with your treadmill, weights, or full home gym, Atlas Route Moving is ready to assist. You can explore our moving services, check our service areas, and use the moving cost calculator to get a sense of likely costs.
When you are ready for a detailed quote that includes your home gym equipment, you can request a free moving quote and share information about your treadmill, racks, and weights. The more detail you provide about your equipment and access, the more accurate your estimate will be.
Related moving guides
You can also browse the Atlas Route Moving blog for more detailed moving tips, checklists, and guides to help you prepare every part of your home for moving day.
This guide is general moving information, not legal, insurance, or regulatory advice. Moving requirements, pricing, access rules, and coverage options may vary by location, move type, building rules, and service agreement.